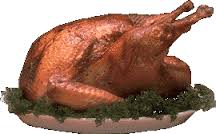
Thanksgiving Turkey Tips

 As a professional organizer, I don’t usually post cooking tips, but making a Thanksgiving turkey can be an extremely stressful endeavor. Should you marinate it? How often should you baste the turkey? Is the hassle and potential danger of frying a turkey worth it? I am all about helping reduce stress and making life easier, so I’m sharing my mother’s absolute best secrets and tips to cook a perfect Thanksgiving turkey.
I would conservatively estimate that my mother – the Fran of Chef Fran’s Kitchenware in Jamesport, Long Island, professional chef and former caterer – has made over 3,000 turkeys in her life. All of them perfectly cooked. Crispy skin. Juicy inside. Here, in her own inimitable words (with section headings from me – I couldn’t resist doing a little organizing) are my mom’s secrets and tips to cook the perfect Thanksgiving turkey.
Defrosting – Allow At Least 2 Days!
If your turkey was frozen, make sure it is completely defrosted before you begin. Pull the giblets and plastic bags out from the cavity after defrosting. Then wash and dry the bird with a dish towel or plenty of paper towels. This should all be done at least 1 day before roasting, or even 2 days.
Seasoning
Seasoning mix: 4 tablespoons salt (sea salt preferred), 1 tablespoon paprika, 2 teaspoons garlic powder, 1/2 teaspoon cayenne pepper, 1 teaspoon black pepper. Oil for coating turkey. This is enough, maybe extra, for a 14 -16 lb turkey.
Season the turkey by lightly coating the bird with oil. Embrace this: slick it up, thank the bird for her service to your meal with her life. Then liberally coat the bird with the seasoning mix, inside and out; pull the skin from the breast and season under the breast. Don’t be afraid.
Cooking
For a 14 lb turkey, allow about 100 minutes from start of cooking, then allow to cool. To cook turkey: Preheat oven to 450 degrees for at least 20 minutes.
So: Put the bird in your pan, then add enough water to the bottom to come up at least 1/2 inch up the sides of the turkey. You can add carrots, celery, onions etc. if you want to, though not necessa. (Note from Lisa: Necessa — pronounced “nessa” — is a favorite family Mel Brooks reference, short for necessary.)
If you do add the veggies, you don’t need to use a roasting rack – just place the bird on top of them. Later, all the stuff left in the pan can be used to make gravy (which is another lesson).
DON’T cover the bird with tin foil. Another secret to getting crispy skin.
Put the bird in the oven and kiss it goodbye for 45 minutes. Let it go! Do not open oven. Then after the elapsed time — which you will set with a timer (Note from Lisa: Yes! A timer!) — lower oven to 335 degrees. Then after a few more minutes, open the oven to make sure there’s water on the bottom of the pan, then add more water if needed. Don’t do anything else. Close the door and cook for another 45 minutes. Remove from oven and let stand at least 15 minutes or more.
NOTE: WE DO NOT BASTE! This is the key to making a crisp, well cooked bird in a shorter amount of time. The science behind NOT basting: Every time you open the oven (to baste) you’re cooling the oven. When you pour liquid (basting) on the skin, you will further cool it down and de-crisp the skin. NOT GOOD.
Carving
Carving is another lesson.
Stuffing
You will see there is no section on Stuffing. DON’T stuff the bird. This – like Don’t Baste – is one of Fran’s million-dollar secrets.
Fran answers the question, Why not stuff?: “In the catering business we never stuffed the bird as it adds way too much cooking time. If you’re not a caterer, stuffing can be delicious when slow roasted inside the turkey – for those who like to get up at 5:00 am to start cooking. Then there’s the salmonella factor…”
If you have a turkey tip, please let me know HERE. I’d love to hear from you.


